Woodenwidget has been selling plans to build folding boats for over ten years and in that time many builders have been kind enough to share their attempts. It is always a delight to see how builders finish their boats. Some copy the plans exactly, even down to the same type of wood and fabric. Most personalise their craft in some way but do not deviate from the plans structurally but every now and then an ambitious builder lets their imagination run wild.
Alex is one of these builders. He owns a rather lovely small classic yacht and he wanted to try and match a dinghy to it. His emails were intriguing and right up to the end I had no idea what he was up to because he said he didn’t want to send any pics until the boat was finished.
So when I finally saw the pictures I was so impressed. He was worried that as the designer of the Fliptail I might be somehow offended by his modifications but nothing could be further from the truth. The pleasure I get from seeing what people do with the design is very heartening.
What you see below is basically the email I got from Alex with his comments and pictures which explain it all much better than I could.
Hello Benjy,
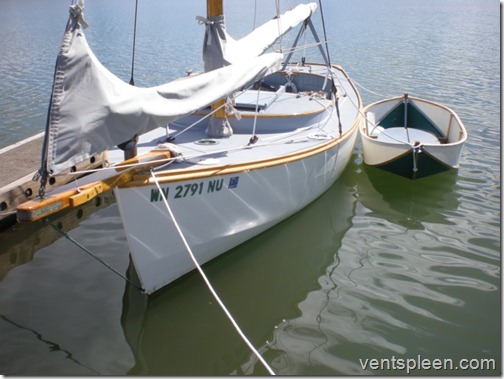
As promised, some construction photos and final results of my Fliptail 7, "Foal", tender to my 19′ Ralph Stanley sloop, "Bucephalus".
First off, I want to say explicitly that none of the diversions I made from your plans were because I felt the design was in any way flawed. All the significant changes were because I’m fussy about wanting something aesthetically just so, or to fit her into her very specific role as a tender. Your plans were excellent, far better thought out than my modifications, and any difficulties I encountered in the construction were entirely my own doing, as would be any failures of the vessel as I built her.
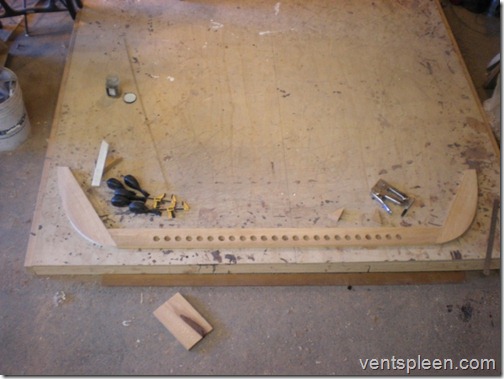
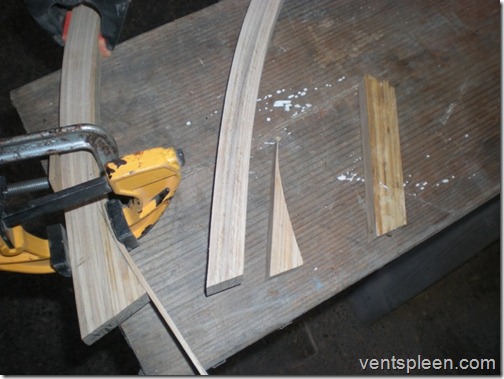
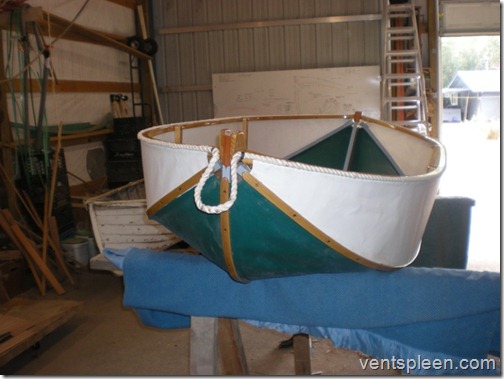
The first big change I made, of course, was making her a peapod, double-ended. This was pretty straightforward: figure out the midpoints of all the longitudinal elements, backbone and hoops, and then mirror the bow section. For instance, two stems:
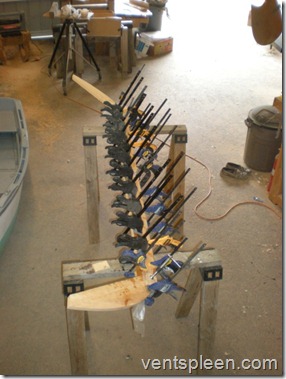
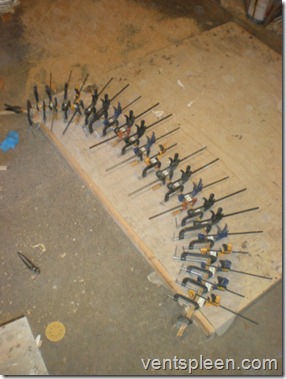
You can’t have too many clamps:
With the hoops, I went a little further off piste. I knew I wanted a concave sheerline, and the best way to accomplish that in this situation was to have hoops with a fair curve, and then angle them down slightly. So the hoops are a slightly different shape than the typical Fliptail’s; significantly, there is no absolutely straight section, they are curved throughout. They still start from the same principles and basic dimensions, though –and they still take a lot of clamps:
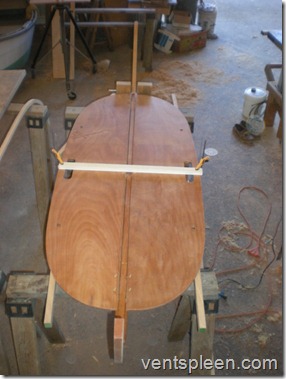
Turns out you can’t get 10mm plywood over here. Even high end wood suppliers stock in 1mm increments up to 9mm, then jump to 12mm. For the sake of lightness, as well as because 12mm wouldn’t fit when folded up, I used 9mm okume. It turns out it’s pretty flexible stuff, when you’re sitting on it, but I think it’ll be fine. Again, I slightly tweaked her plan view, even beyond making her double-ended, to fit the differently-curved hoops:
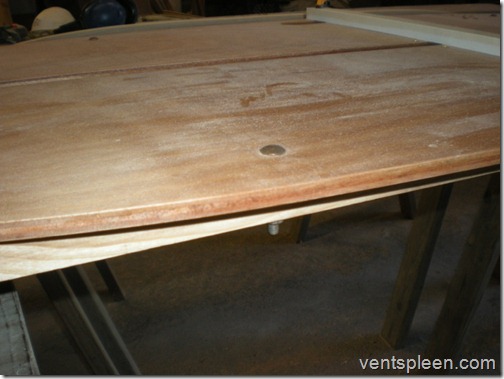
Given that she will be used in a salt water environment, all hardware is either brass or bronze. This includes 1/4"-20 bronze carriage bolts for the floorboard supports, since I didn’t have a full 10mm of ply to countersink for machine screws. (As an aside, reconciling your metric instructions to my SAE working habits and materials suppliers was a challenge in its own right):
A minor change of detail, on the keel cheeks, to remove a sharp point:
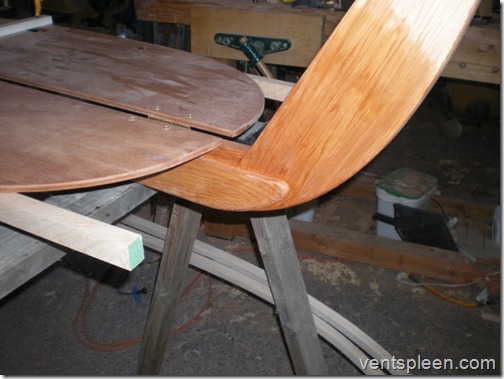
I couldn’t bear to let the offcuts off the ends of the hoops go to waste, and since I wanted something a little curvier at the ends of the hoops than the cedar wedges specced in the plans, to show the sheer better, I used the offcuts thus:
Foal’s construction sequence has been considerably different from that you outline for the typical Fliptail. I have done a lot of pre-fitting of parts, since I’m detailing them differently, which means I need to assemble, disassemble, adjust, check the fit, and only then start varnishing and painting, once they’re shaped as I want them. The complexities of changing her to have a concave sheer made things even more difficult, as everything had to be assembled, scrutinized, and adjusted many times to be sure the curves were coming out right. It has definitely slowed the process, but I think the results are worth it.
To match her parent vessel, Foal is painted blue-grey inside, with bright trim.
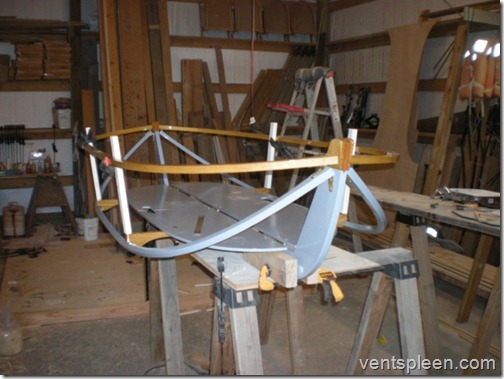
Lower hoops in place:
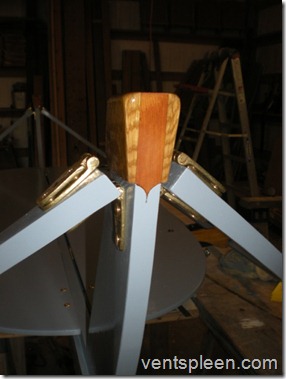
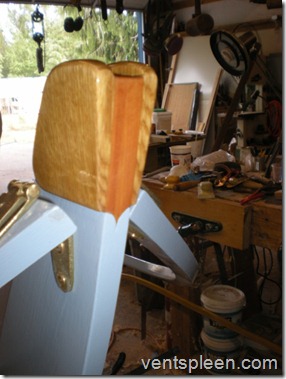
Stem detail. The oak bearing pads, laminated to the stem and sternpost, have their outside faces canted out about 6°, to angle the upper hoops downward and create the concave sheerline. Angling the hoops down reduces her freeboard by a couple inches, but the geometry also works to give her sides a bit more flare:
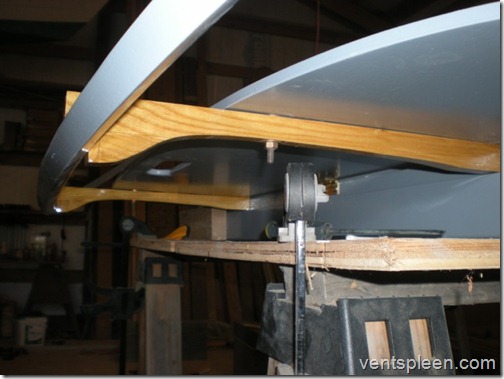
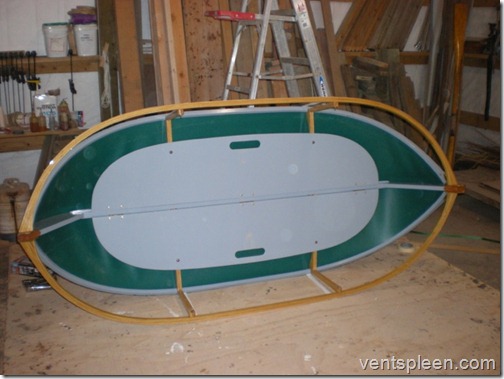
Since I had the ash offcuts on hand, and it makes nice detailing when finished bright, the floorboard supports and upper hoop supports are of ash instead of cedar. Since the assembly process was slow anyhow, I took the time to laminate the brace-blocks onto the floorboard supports, instead of screwing them on, and shaped some curves to get rid of some weight and lighten them visually. I also glued a pad across the end grain where the lower hoops bear, to protect the end grain from splitting. In this photo, the bolts all have yet to get their nylock nuts, and be trimmed to length:
Sternpost detail. I left the pads long to create a fairlead, either for a towline, for towing Bucephalus, or for rowing out a kedge, or taking a warp ashore for mooring or warping in. The hoops also sit an inch lower on the sternpost than on the stem, to enhance her sheer:
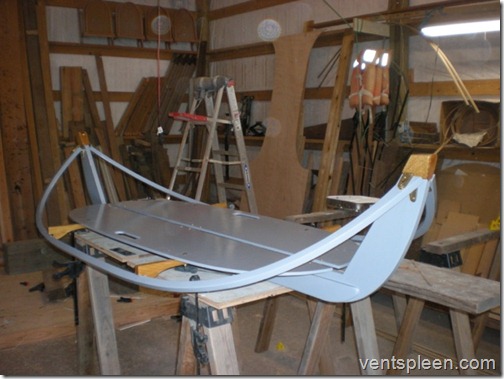
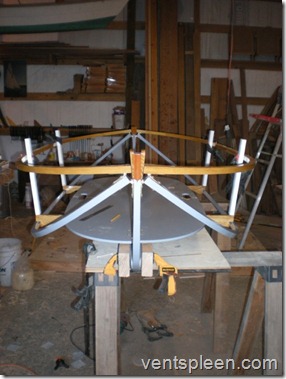
Upper hoops in place, with temporary vertical supports to fine tune the sheerline. Angling the upper hoops down to create the sheer had the effect of flaring the sides, which angled the bottoms of the upper hoop supports inward, and in turn meant the floorboard supports needed to be shortened:
You can see the 12° of "deck camber" a bit better here:
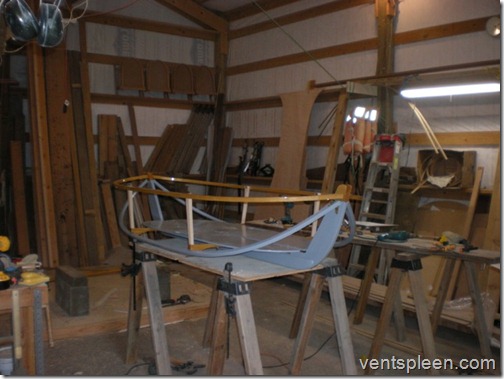
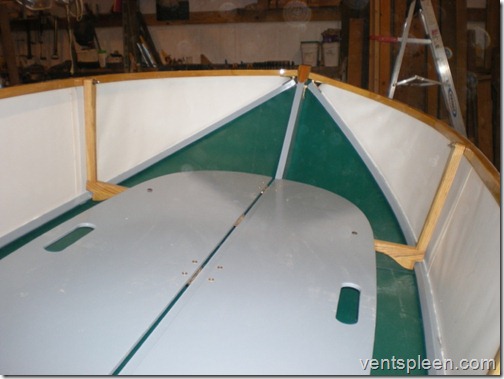
Final vertical supports in place, but not yet varnished. There’s only so much you can do to add sheer to a 7′ boat, but from a little distance, she does have the tiny bit I had hoped for:
I have an unreasonable hatred of barrel-bolts. To avoid using them, I instead shaped the heads of #6 screws on my lathe to remove the flare of the heads, and screwed them into the endgrain of the vertical supports. I then drilled into the floorboard supports and lined the sockets with open-ended Chicago screws left over from the floorboard hinges. The Chicago screws have a slight crown to the end, which provides both a strike plate for the screws/pins and a little more clearance to allow water to drain off. It takes stretching the fabric a bit to get the verticals into place, but they hold their position quite well:
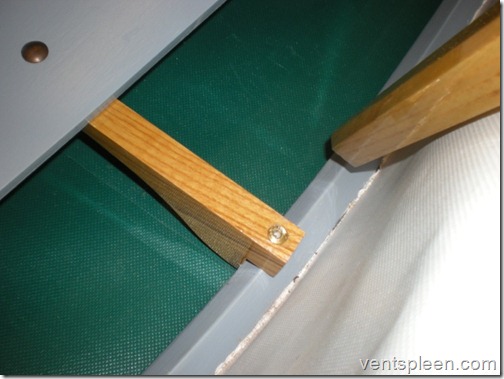
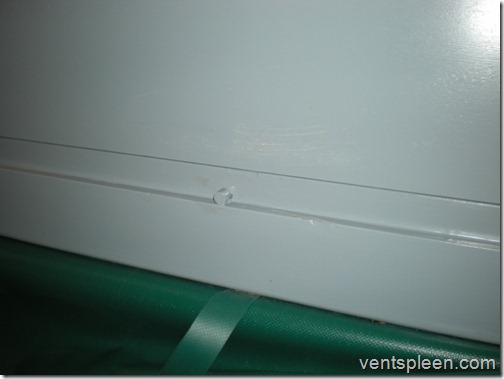
I also re-invented the detail of how to locate the floorboard supports on the lower hoops. Instead of notching the lower hoops, I drove a 1/4" oak dowel through the keel, to serve as a stop for the floorboard supports when they are swung into place: (designer’s comment: Normally a small flat is cut on the upper side of the hoop and the floor support locates in the slot. This is so that when rowing you can put your feet on the supports and force against them. I worry that Alex’s solution is not ‘idiot proof’ but so long as he is aware of the issue, his solution is fine)
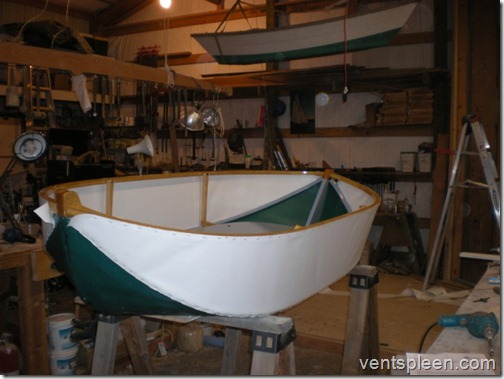
Covering the modified hoops went just fine. To match Bucephalus –and my other dinghies– I used dark green fabric for the bottom panels and white for her topsides. For sealant I used up a couple partial tubes I had on hand of both 3M 4200UV and 3M 5200, aka "demon snot". In keeping with her bronze and brass hardware, for salt water resistance I used 1/4" monel staples, for longevity:
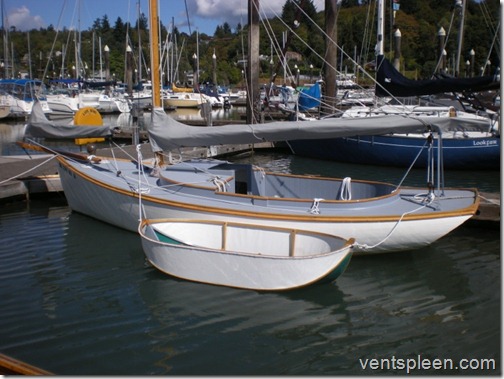
Foal together with Bucephalus’s "home waters tender", Toggle:
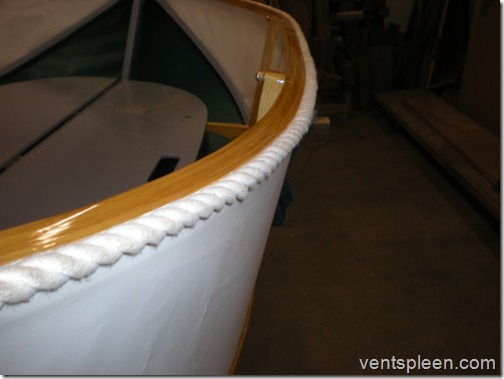
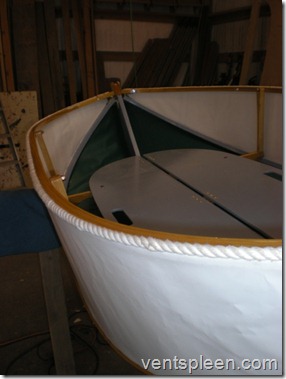
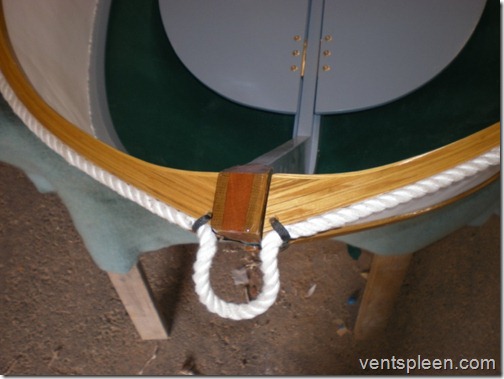
For a rubrail I did as I had done on Toggle, and used a length of 3-strand spun dacron (1/2"), long-spliced into a loop. I first routed a 1/4" radius cove 3/16" deep into the upper hoop, positioning the cove at the top edge of the hoop so that the rope would stand proud of the wood both on top as well as to the outside. This is because I’ve found that when coming along side a larger boat in any sort of a chop, a dinghy will tend to sort of scoop its rail up and into the larger boat, not just bang against it sideways, so padding along the top edge is warranted as well. (Also, bronze nylock nuts are now in place.):
With the cove shaped, I stapled the top edge of the topsides fabric into the cove, so that the fabric turned over the bottom edge of the cove. Ideally this will ease some of the point-loading against the staples. The rope rubrail then covered the edge of the fabric and is secured in place by 3/4" #6 bronze round-head screws: you insert the screw in between two strands of the rope, and then drive it *through* the third strand and into the rail, so that when it is driven home, the head disappears beneath the first two strands. Be sure to use round-head screws for this, if you try it: flat-head screws tend to frazzle the rope as you’re driving them. There are slight bulges where the screws are, but those tend to get less obvious over time:
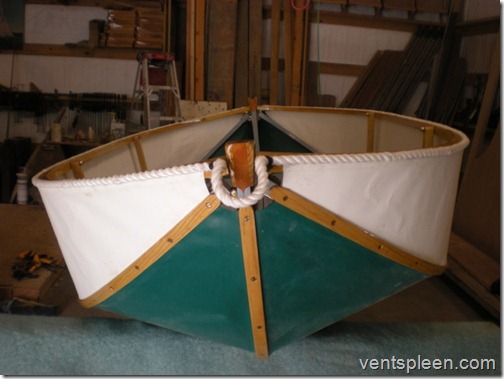
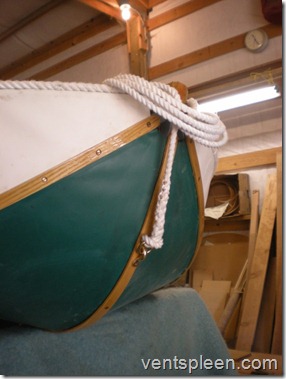
At stem and stern I left bights of rope long enough both to let the hinges work and to use as lifting handles:
The aft bight is longer, to work as a sling for rowing out an anchor:
To take the strain of lifting, the rubrail is also seized to the upper hoops close to the stem and sternpost:
The sternline is just girth hitched to the stern lifting becket, since it’s unlikely to take much strain, or even to get much use, but for a little bit of "bling" the painter is girth hitched to a bronze captive ring:
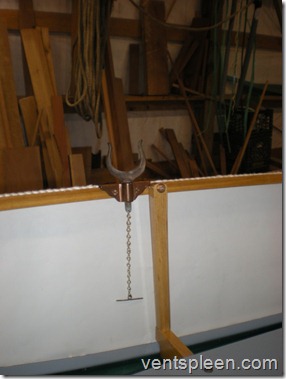
As for where to put the oarlocks, it turns out your written instructions were, for me, exactly right: they work well immediately abaft the aft upper hoop supports. With two people in the boat, each sitting at the extreme ends, that position even works (sorta; adequately) to row stern-first and keep the boat a little better balanced on her waterline. Contrary to what you indicate in the instructions (yet again!), I installed the oarlocks to the inside of the rail rather than to the outside: I lose a couple inches breadth of effective rowing position, but it removes any chance of dinging the boat I’m coming along side of:
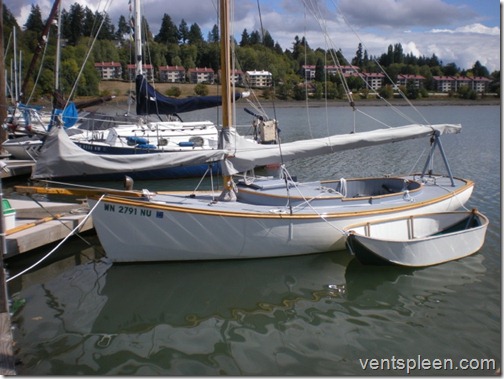
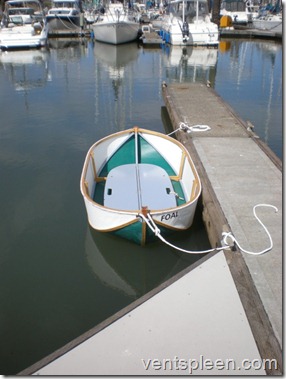
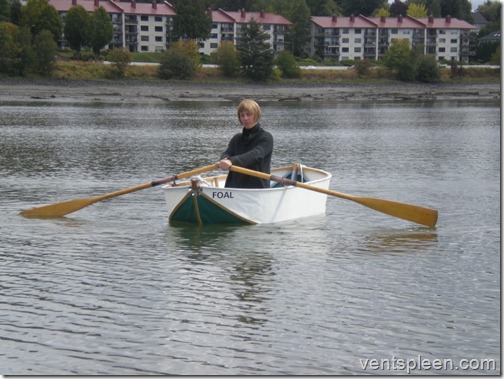
And Foal has now had a preliminary bout of sea trials. I don’t have any photos of her under way, as I was the photographer and could not both row and operate a camera, but here’s proof that she does float:
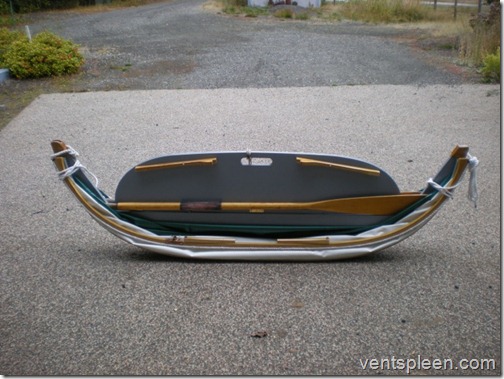
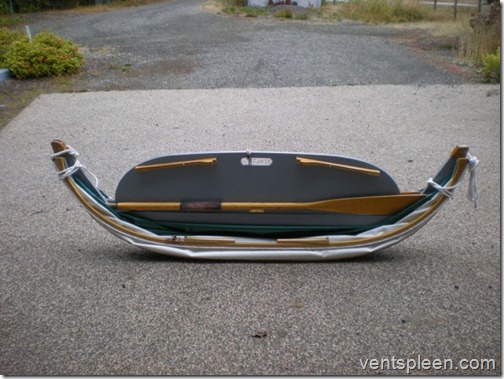
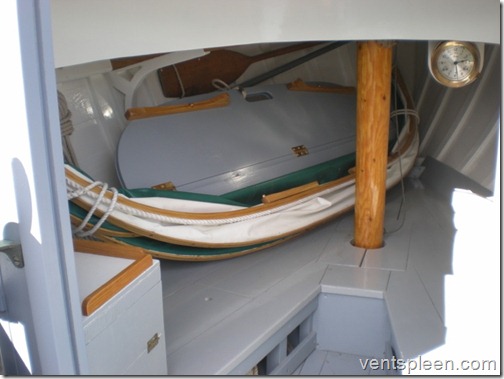
She also makes a very tidy package, with a pair of 6′ oars. I’m still working out the best way of lashing her for stowage, so please excuse the painter and sternline macrame:
I am happy to confirm that she is surprisingly stable, and rows far, far better than I had expected (even with the rowlocks just clamped in place). I admit, I expected her to handle like an overturned umbrella in a duck pond, but that expectation was completely unjust, and her handling is stellar. I think she will be an even better tender than I had hoped for:
Many thanks for all your support throughout the build. Let me know, now or in the future, if I can provide any details of Foal’s build, or the suppliers of her materials, for Wooden Widgets’ library of information.
All the very best,
Alex
