Alright, I know this picture has nothing to do with Wifi on boats but it’s such a lovely image and pics of connectors and bared cable are very dull. Leica M9, 21mm Asph. Cannes. Yacht Eileen (as seen in Duran Duran video Rio).
Living on a boat is great but sometimes I do envy those who have more permanent abodes. Not because they have more space or somewhere to park the car but because they can have a telephone line and thus a reasonably priced Internet connection. Without this simple cable, getting on-line can be extremely difficult and quite expensive as I have discovered to my cost over the last 10 years or so.
The simplest way to connect to the Internet is to get a 3G USB key from your phone provider which works wherever there is mobile phone coverage so it can even work a mile or two offshore. The problem with this system is that it is slow and overpriced and there is usually a monthly limit on downloads. If you pass the limit the tariff goes through the roof and it’s no fun trying to do research on-line knowing that every minute is costing you dearly.
I tried it for a year and it cost me well over $1000. Although I need the Internet to run my small on-line business I don’t need it that badly! Any profit I might make is offset by the cost of going on-line It’s true that this system does work in other countries but at nearly $30 a day it’s far to expensive to use, even to check the weather.
So because I have no fixed line and 3G was too pricey, I was left with making the Wifi work better. After all there’s Wifi all around us these days and much of it is free if you are near enough to capture it. The standard Wifi system built into the average laptop works fine when you are close to an Access Point (AP) or have a clean line of sight to it but otherwise it’s pretty hopeless.
What is needed is an external antenna. Most antennas require a separate power supply which is an added complication especially as many of them are designed for houses with mains voltage. There are a few external antennas that use just a USB plug and get all they need from the computer so they don’t need a separate power supply. Enter the Waterproof Wave RV from RadioLabs which comes with 15 feet of cable.
By taking it some of the way up the mast it was able to find more signals and was very helpful for a while but it was annoying having an ugly white stick dangling in the rigging and often the mast was in the way so it would constantly need repositioning. When it stopped working I took it apart to see if there was anything I could do and found it half full of water. So despite the manufacturers claims it seems it wasn’t up to the marine environment.
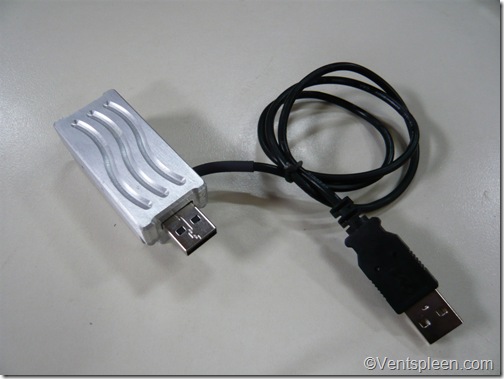
Tiny but powerful. The Shireen wifi adapter.
Obviously I needed something a bit more serious and having tried many of the cheaper options it became clear to me that if I wanted a reliable and consistent system I needed to buy the very best of everything. It is not possible to connect an antenna directly to a computer, you need what’s called a Wireless adapter. These come in a variety of sizes and prices starting from about $30 but few allow an external antenna. The ones that do are typically about half a watt in power but I wanted more. I finally found what I was looking for at a company called Shireen. They seemed to be the only ones offering a 2 watt adapter.
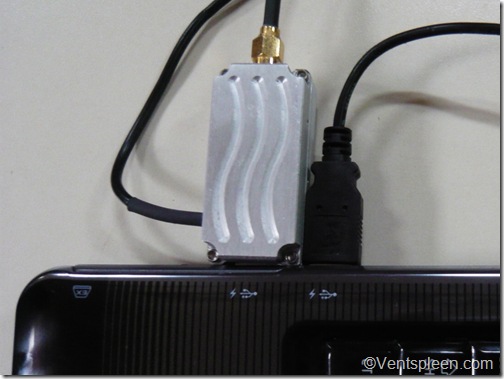
The Adapter fitted to the laptop using two usb ports.
It needs two USB ports, the second being for the extra for the power it needs. It is made from solid aluminium presumably to help dissipate the heat it generates while operating. It has two lights, a red one to show that it is powered up and a green light that shows when it is working. It has a solid quality feel to it and it’s tiny, just a couple of inches long but here is a case where size isn’t everything. All I had to do now was work out what connectors, cable and antenna I needed to go with it.
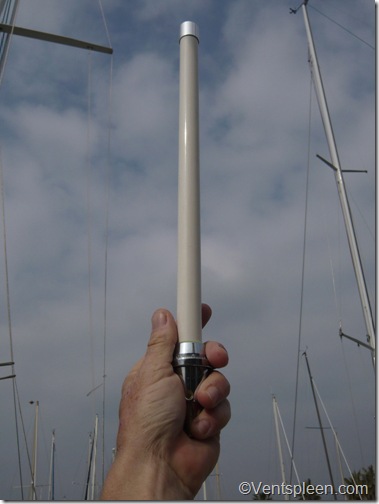
8 db wifi antenna is about 15” high
Antennas are sold with different decibel ratings. Put simply, the higher the number the more powerful the antenna. They are also sold as directional or omnidirectional. Obviously on a boat when you never know which direction you’ll be facing from one moment to the next, you need an omnidirectional one. I chose an 8db model as it was only about 18” tall and not over 36” like the 15db model. There must be compromise somewhere and I liked the idea of a small, light and unobtrusive antenna. It seemed to me that the best place for it was at the top of the mast where it would have a full 360 view and would be high enough to pass over the top of most obstructions.
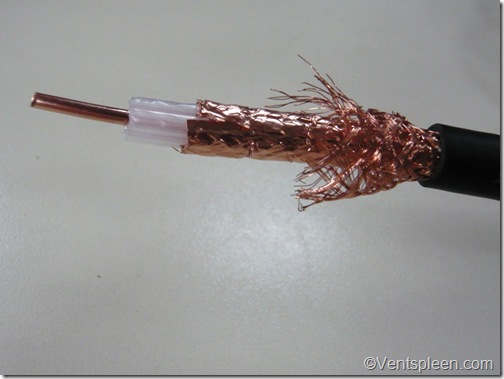
The Westflex 103 low loss coax. That centre core is solid copper almost 3mm in diameter!
The choice of cable was much simpler. Here the fatter the better. Thin cables lose too much of the signal. After much research I chose a heavy beast of a cable with a solid copper core of 1/8” and diameter of 7/16” but despite that it still manages to lose 2db over just 30 feet, dropping the potential output by 25%. This just goes to show how important having a good cable is. The cable is called Westflex 103 and is available from W H Westlake
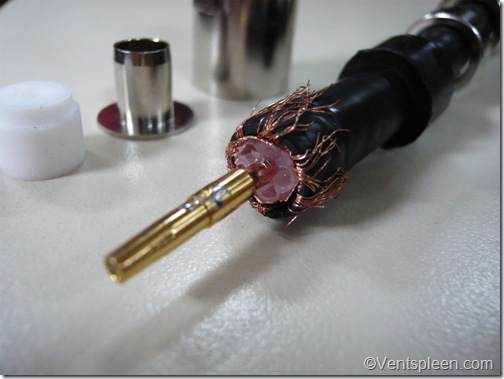
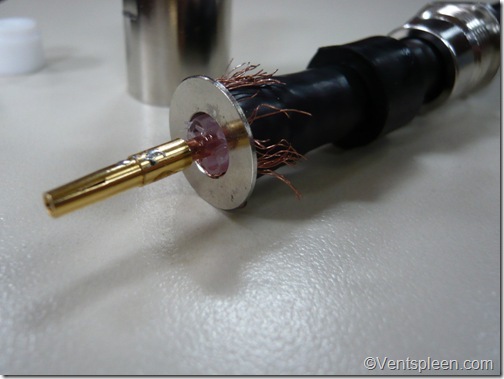
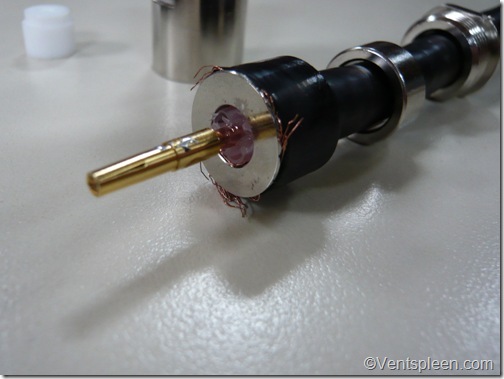
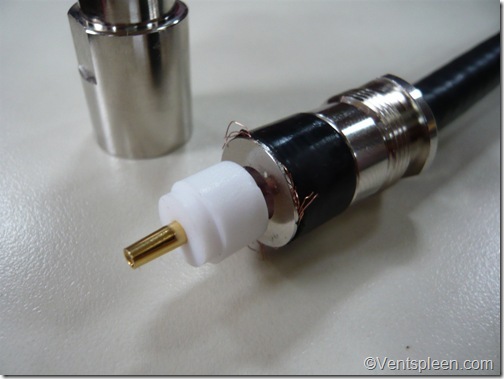
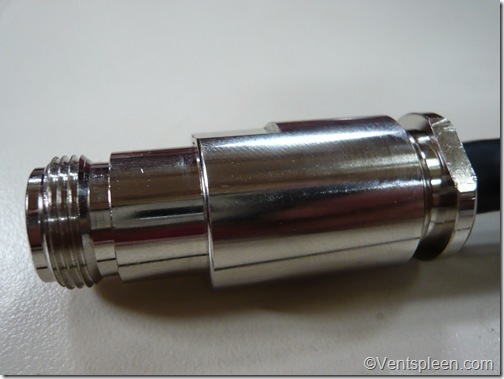
It doesn’t matter how good your cable is though if your connectors are inadequate. To go with the cable I bought some serious connectors that have to be soldered and then tightened up with wrenches to ensure a waterproof seal. The cable has to be cut down in a certain way to work with the connector but the instructions made perfect sense and the connectors went together logically and easily. It is possible to buy cables with the connectors already fitted but I barely had room to fit the cable in the mast conduit, let alone the connectors which are over 3/4” in diameter. (connectors also bought from W H Westlake)
Stages of connector assembly: Here the brass tip is soldered to the copper core.
Next the ‘hat’ is inserted.
The rubber gasket and metal spacers are slid upwards.
Plastic insulator is fitted.
The connector is screwed together and tightened with spanners.
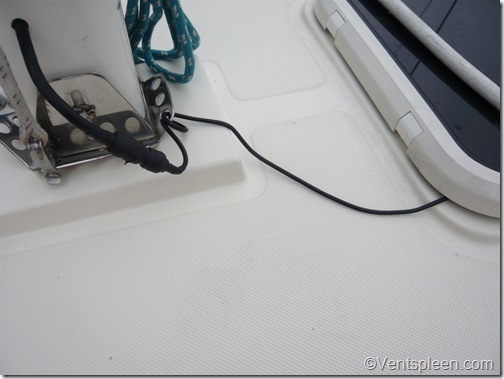
I didn’t stop there. I put Vaseline (petroleum jelly) on the connectors and then wrapped them up with self amalgamating tape just to be sure water can’t get in. On the Dana there is no easy way to feed cables through the mast step. The mast would have to come down and the compression post be removed to get access to the roof above the head lining. So to keep things simple the thick cable comes out of the mast at the step and terminates there.
There are a bewildering array of different Wifi connectors available but basically most outdoor antennas use the N connector and most Wifi adapters use a RP-SMA connector. In case you were wondering, the RP stands for Reverse Polarity and the SMA stands for Sub Miniature type A. The N connector was designed in the 1940s and was named after it’s inventor, a Mr Paul Niell. I bought an N to RP-SMA cable that I attach to the mast cable and then feed it into to the boat through the fore hatch. It’s not the most elegant solution but it was certainly the easiest one and it allows the shortest possible run of cable.
The Westflex cable terminates at the foot of the mast. Another smaller cable is fed below via the hatch. It’s not the neatest solution but to fit the cable through the deck is a hell of a big job.
My laptop can see about 3 or 4 APs on a good day when I am down below in the boat but with the new adapter connected to the mast head antenna I can see about 30! Not only can I see more APs but when I connect to familiar ones I find the speed and quality of the connection massively improved. Sometimes I am amazed at the speed, entire programs hundreds of meg in size can often be downloaded in just a few minutes.
The range has also been much improved. Recently the marina Wifi stopped working and I needed another connection. In the end I found one from the marina next door almost a mile away as the crow flies! What’s funny is that we used to keep the boat in this marina and nothing I ever did was enough to get their Wifi working on the boat. Now with the new antenna and adapter it works fine even though I’m so far away.
The system also works extremely well when at anchor. The height of the antenna means a good potential range and in fact we have been able to use a connection from an Internet café over 4 miles away! The rolling of the boat or the direction we face seems to make little difference to the performance.
The adapter cost about $300, the cable was about $50 and the connectors another $30 and the antenna also $30. So certainly not a cheap system but if you want Wifi that really works I cannot recommend this combination highly enough. The heart of the system is clearly the quality wifi adapter but it needs a decent, well placed antenna and the lowest loss coax cable you can fit to really do it justice.
The output of wifi installations is regulated so you’ll need to check that your system doesn’t break any laws. The wifi output power is calculated in Watts taking into account the power of the adapter, the loss of the cable and the db rating of the antenna. 2 Watts seems like a lot but after it has gone through 40 feet of cable it is much reduced. Each installation will be different. The allowed output power also varies from country to country. What might be legal in your country may not be when you cross the next border.

Can you post some pictures of the mast installation of the wifi antenna?
Is it correct that I can see the antenna in the profile photo with the grey mizzen mast in the Dana 24 review?
Thanks.