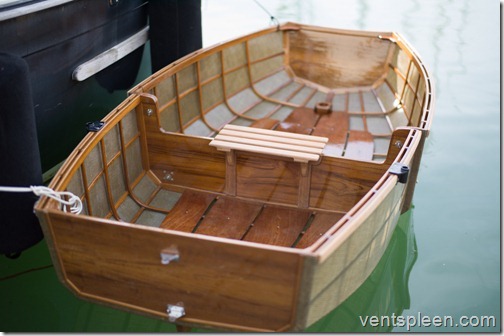
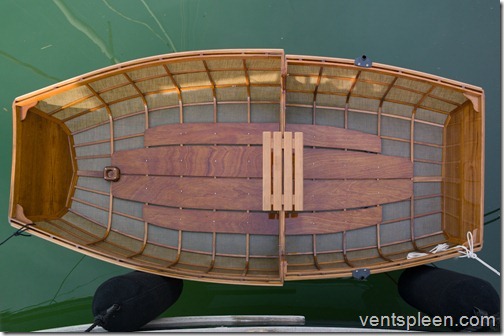
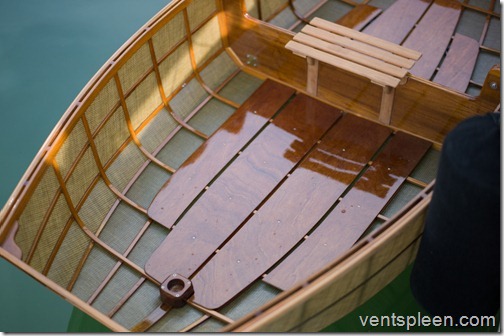
The Woodenwidget Stasha ‘Tweed’ special edition lightweight nesting dinghy.
The Stasha lightweight nesting dinghy from Woodenwidget has been around now for a few years and I used the prototype for three years as my yacht’s tender. In many ways it’s the perfect dinghy for the Pacific Seacraft Dana, after all it was designed to fit on one! It is easy to stow and launch but more than that it is a fabulous little boat. It is a joy to row and it sails superbly too. When the prototype was showing signs of wear I thought about just putting a new skin on but in the end decided to do something a bit different. And so was born the Stasha ‘Tweed’
The biggest difference between a standard Stasha and the ‘Tweed’ is the fabric. The standard Stasha uses a thin and lightweight heat shrink Dacron covering which is then coated. The ‘Tweed’ uses a Flax fabric woven in the UK. It is specially woven so that it ‘drapes’ well and can conform to a curved surface such as a boat hull. It is normally used with a bio resin that cures with sunlight but I did not try this method deciding to use epoxy resin instead. Not because I think it is better or anything but simply because I had been given a load leftover from another job. If it wasn’t used it would soon be of no use so by using it I avoided buying something and stopped it being wasted.
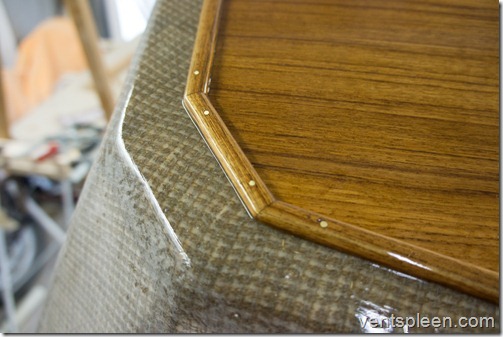
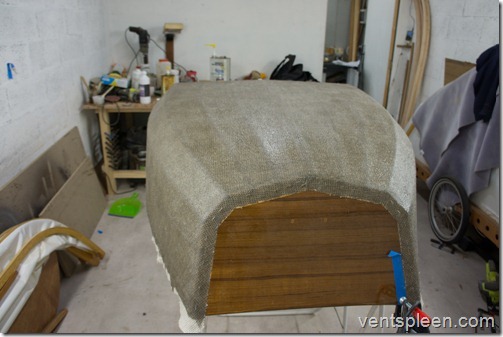
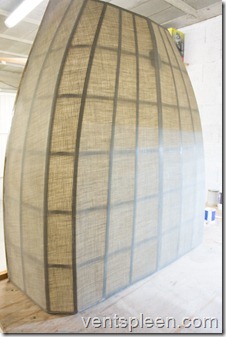
Close up of the cloth at the bows. It wasn’t even necessary to overlap the cloth leading to a very tidy look. The fine trim was added to cover the join between the cloth and the panel. This wasn’t entirely necessary as the join was fairly neat but it does lend a pleasant finished look and may even protect the bow panel from damage.
I will be discussing using this material later in this post but if you’re interested here is the link to the site where I bought the Flax fabric. It is the Hi-No twist fabric at £22-50 a metre. The roll is 1.38 m wide so for the Stasha it meant laying it across each section to get enough width to cover in one piece.
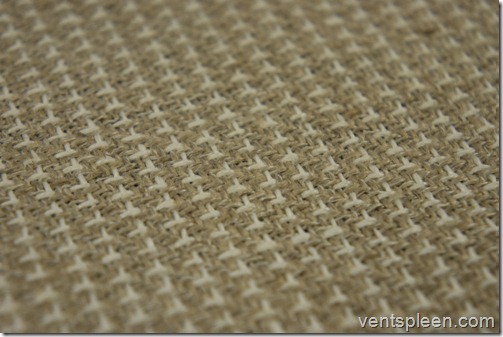
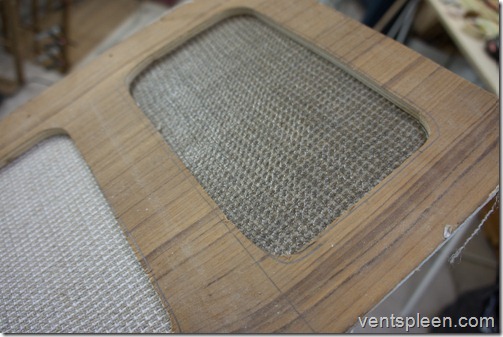
Close up of the raw Flax fabric before epoxy.
One of the problems about using epoxy is that it is brittle and without modification would lead to a fabric covering that could be punctured too easily. In order to make the epoxy a little flexible you can add Benzyl Alcohol. About 2-3% is plenty. It’s a simple and cheap way to do it.
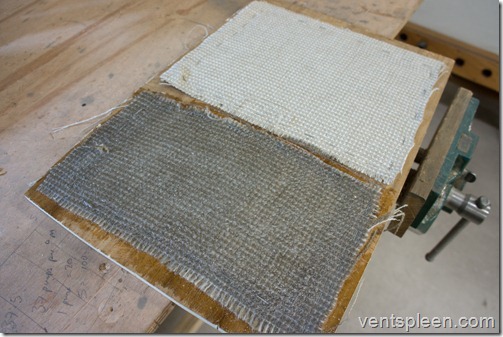
The test bed for the fabric. This is the finish after the first coat of epoxy. As you can see the finish is very rough so needs sanding and further coats of epoxy.
The fabric is 400 grams a square metre which makes it twice as heavy as the Dacron before the epoxy is even added so using epoxied Flax is not a light option. However the standard Stasha proved to be so easy to stow and use on the boat that it wouldn’t really be a problem if it was a bit heavier. Especially considering that the boat is in two halves so it’s already easy to handle.
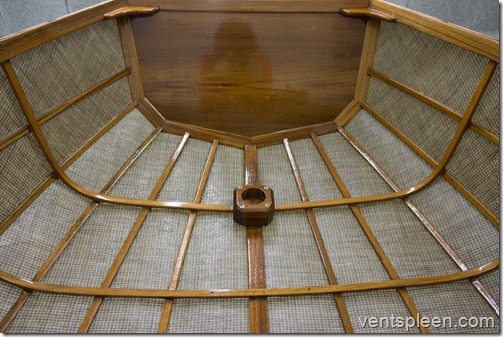
This is how the fabric looks on the inside after epoxy. The finish is much smoother on the inside but far from flat and smooth.
The other difference between the original Stasha and the ‘Tweed’ is that it is made entirely of teak, not ash. Again, this was wood left over from another job and so it would be a shame not to use it. I didn’t know if it would be possible to bend the ribs using teak as it is a much stiffer wood than ash and not known for its flexibility or bending qualities but it wouldn’t hurt to try. If the worst came to the worst, I could always have ash ribs and teak stringers. That would have looked ok.
Bending the teak ribs in required planning, patience and lots of spare wood. The extra stiffness of teak makes this a very hard job. Ultimately successful however. Wood is an amazing material.
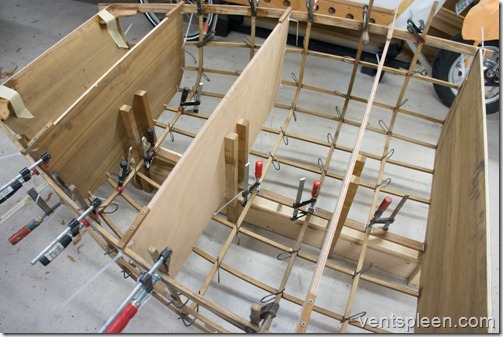
As it happens making the ribs bend was certainly possible but required a lot of patience and spare pieces of wood as the breakage level was high. In a couple of areas I was not able to make ribs in one piece so had to scarf two pieces together. This was no problem but did add time to the build. The orientation of the grain was crucial as well, the slightest run off and the ribs would split. I soaked them before hand for a number of days and kept them wet while I was teasing them into place on the strong back with the hot air gun. It took a very long time to do the ribs and the teak was so much stiffer that the ribs would have a tendency to force the stringers away from the strong back. Ultimately I succeeded but it was not easy.
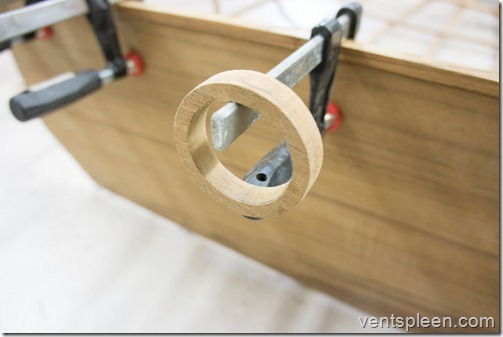
One of the wooden rings cut out using two blades in the hole cutting saw. This was then cut into 4 and used to trim the plywood end grain.
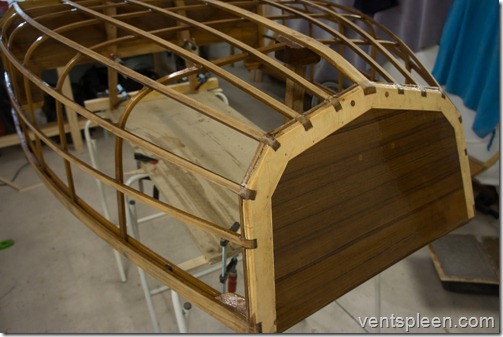
Another difference is that every piece of plywood on the ‘Tweed’ has been capped with solid wood so that there is no end grain showing. This is a surprising amount of work, especially where the two sections join as the cutaway has rounded corners. The quickest way I have found to do this is to use two blades in a hole saw and cut out a ring of wood. This is then carefully split into 4 with the grain orientated and then it is glued to the plywood. One of the things that takes so long with adding trim to plywood is the care that you need when trimming it down level.
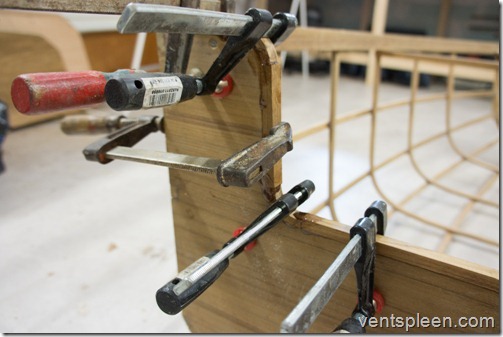
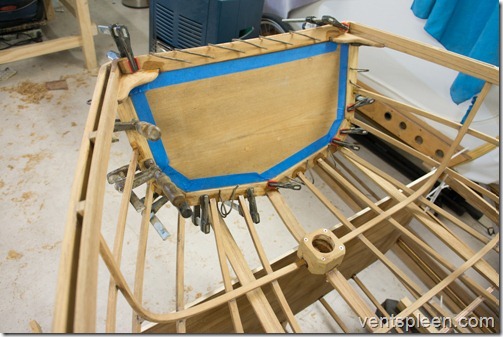
Here the plywood end grain trim is being glued on. They will be planed down flush later.
The best approach here is to simply glue on a piece of trim that is slightly wider than the plywood. When it has set, use a hot air gun on the lowest setting, warm up the excess epoxy so it becomes soft and scrape it off using a sharp scraper. This is a very gentle operation. The epoxy will come off very easily with a little heat and a little patience. Once the epoxy is removed it is time to plane down the trim flush with the plywood. Remember that most plywoods have a top veneer of a half a mm or less. You cannot afford to cut into it at all. So a very sharp block plane is needed and also lots of care. Gradually plane down the trim until it is flush. Then use a block and some 180 sandpaper to clean it up.
Gluing on the inner trim. This is something the standard Stasha in its never ending quest for weight loss never had. It adds a little weight but gives a very sleek look on the finished dinghy.
The last great difference is the addition of inner trim pieces to cover up where the stringers are glued into the end panels. It adds a ‘finished’ look to the boat and also strengthens the glue join. These take a long time to make and fit too as they need to be very neatly made. The quickest way I found was to make a cardboard template for each piece.
The seat used to scratch the varnish on the Stasha so now there are pieces of wood that will remain unvarnished instead. The seat is now made from slats of unvarnished teak rather than a single piece of plywood.
If you were thinking of building a Stasha ‘Tweed’ then I must warn you it’s a lot of work and it demands more skill than for a standard version which is very easy and fast to build. It will weigh about 50% more. With floors and seat it weighs about 17 kilos which is about 5 more than the standard boat but as I said, because it’s in two pieces not one section weighs more than ten kilos.
Asides from weighing a lot more it takes about three times longer to build and uses about five litres of epoxy and two litres of varnish!
The end result is a lightweight but virtually indestructible hard nesting dinghy. It is also extremely nice looking.
The finished fabric is almost two mm thick so a rebate needs to be cut out of the exterior edges of the panels so that the fabric fits flush in the end.
Also, because of the extra thickness of the fabric it is necessary to remove a couple of mm from the sides of the joining panel on the rear section or it will be too wide to nest without scraping the varnish.
The varnished front section with panels rebated a little to allow for the thickness of the fabric. The standard Stasha uses much thinner Dacron that doesn’t need to be rebated.
Here’s how the fabric is fitted: The fabric is not wide enough on the roll to fit from one gunwale to the other but it is wide enough to cover from front to back. I bought 4 metres of fabric and didn’t have much left over.
One of the great advantages of this system is that you do not have to rush or panic. You will epoxy only when you are happy with the fitted fabric. It is worth taking your time to get the fitting of the fabric correct because when it is epoxied and varnished it is translucent and any kinks or jumps in the weft or weave of the fabric will be very noticeable.
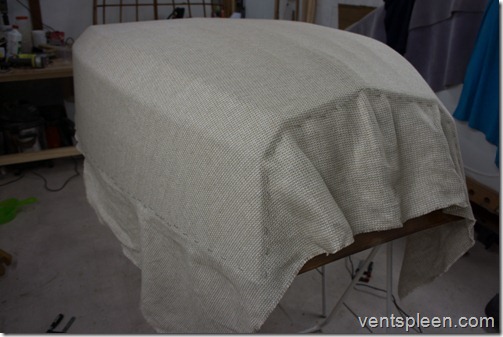
The fabric draped over the framework, tensioned and stapled in place.
The fabric needs to be stretched tight before epoxying or it will sag with the weight of the resin. The problem is, how to get the fabric tight when it is such a loose weave. If you pull on one part, it pulls the weave out of line. I used staples to hold the fabric tight. It took a long time to pull it all tight while still keeping the weave straight along the keel. It took a lot of putting staples in and then pulling them out again as I tightened first one side, then the other all the time keeping tension fore and aft as well. This is quite tricky to do as you need as much tension as you can get but without pulling the weave apart or distorting or pulling the weave out of line.
However there is no rush so you can take as long as you like to get the fabric laying right. I found that the fabric lay well over the entire front section if I pulled the aft corners aft first. Then by the time I got to the front, the fabric was able to cover the whole shape in one piece without kinks or pleats. I was particularly impressed that I managed to get the fabric to follow the bow section without having to cut any fabric out.
To make working on the dinghy easier, I varnished the entire framework (except the outer surfaces) with three coats before fitting the cloth. Varnishing the framework is a complete pain in the arse, as is sanding between coats. The plan was to do three coats on the framework and then two entire coats inside making 5 coats for the woodwork and 2 coats for the fabric.
This is what the front section of the dinghy looks like after its first coat of epoxy. The colour is good but the finish is very rough, far too rough for a boat. It will need sanding smooth and more epoxy then two coats of varnish before it is finished.
The epoxy is brushed on liberally. It is amazing how much epoxy the thick fabric will soak up. I did a test piece first to judge how to apply the epoxy. In the event it was very forgiving and I had no drops of epoxy come through the cloth despite a heavy application. The ideal is to have enough epoxy to wet out the fabric but not so much you are adding weight for no reason. The trick to getting the folded corners to stick down is to apply epoxy to the wood underneath it first, then dab the fabric down with more epoxy.
The finish on the outside after three coats of sanded epoxy.
Once the epoxy is set it needs to be sanded smooth. If you have applied enough epoxy you will find that even with some quite violent sanding (I used 60 grit on a random orbital) you won’t go through to the cloth. In a couple of places the cloth was visible but that was OK as it needs another couple of coats, each one sanded down smooth. Then the whole surface was sanded down with 120, then 180 and finally 240 grit. Then it received a further two coats of varnish. The varnish is needed as otherwise the epoxy has no UV protection.
Almost finished varnishing. Four coats on the wood and one on the cloth. It will receive one more coat all over. Note the trim around the stringers where they fit into the front panel. A small touch but makes a large difference to the looks. The epoxy used to glue in the ribs had teak dust blended into it to darken it making it very hard to see it.
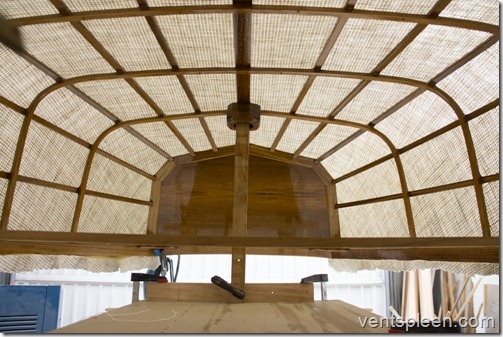
The end result is a thick yet slightly flexible and extremely tough skin for the boat. It looks fantastic with the light coming through it. I am happy that I took so long laying the cloth so that the weave was even.
Conclusion:
Not for the faint hearted. Sanding epoxy is a thankless task and varnishing to that level is also soul destroying. If you have 120 plus hours spare then all you need is a set of Stasha plans from Woodenwidget.com and this article and you too can have a splendid looking lightweight nesting dinghy like the Stasha ‘Tweed’.
View from the inside with the light coming through.
